
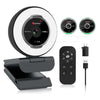

 967Ultra
 Angetube 913Ai
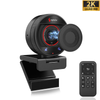
 Angetube 866MAX
 Angetube 914Max
 PTZ 4K 871Ai
 Angetube @30fps 863Plus
 Angetube @60FPS 873Ai
 Angetube 967Pro
 Angetube 967
 Angetube 862Pro
 Angetube 680C
 Angetube 920
 Angetube 963
 Angetube 962
 Angetube 925c
 862Pro
 863PLUS
 913AI
913AI
Why Your Webcam Looks Grainy at Night—and How to Fix It
Sep 27, 2026

Why Does My Webcam Look Grainy at Night?
You sit down for a video call in the evening, turn on your webcam, and suddenly your video looks completely different.
During the day, your webcam looks clear and sharp. But at night, the image becomes grainy, noisy, blurry, or washed out.
So, is your webcam broken?
Usually, no.
In many cases, the problem is simply not enough light.
When the room gets darker, your webcam has less light to work with. The camera may increase its sensitivity or adjust exposure to make the image brighter. However, boosting a weak image can also make digital noise more visible.
The result is the familiar grainy webcam look.
The good news? You can often improve your video dramatically without immediately buying a new camera.
What Causes a Grainy Webcam at Night?
There are several common reasons why your webcam looks worse after dark.
1. Your Room Is Too Dark
This is the most common cause.
Your eyes can adapt surprisingly well to a dim room. A webcam sensor cannot do this in quite the same way.
When there isn't enough light reaching the sensor, the camera has to compensate. Increasing gain can make the image brighter, but it can also amplify unwanted noise.
That's why your webcam may look:
- Grainy
- Noisy
- Soft
- Blurry
- Less detailed
- Less natural in color
Adding light to the scene is often the simplest first step. Recent webcam guides similarly recommend improving the light on your face before changing camera hardware or relying heavily on software adjustments.
2. Your Light Is Behind You
This is another extremely common webcam mistake.
Imagine sitting in front of your computer with a bright window or lamp directly behind you.
To your eyes, the room may look perfectly bright.
But your webcam sees something different:
Bright background + relatively dark face
The camera's exposure system has to balance the entire scene, which can leave your face looking too dark.
Try this instead:
Put your main light in front of you, rather than directly behind you.
A window in front of your desk can work surprisingly well during the day. At night, a desk lamp, monitor light, or dedicated webcam light can provide a more consistent result.


3. Overhead Lighting Can Make Your Webcam Look Worse
A ceiling light may make the room feel bright, but that doesn't necessarily mean your face is well lit.
Light coming from directly above can create shadows around:
- Your eyes
- Nose
- Cheeks
- Chin
Your webcam then has to capture both bright and dark areas at the same time.
For video calls, a light positioned in front of you or slightly above eye level can produce a more balanced image. Some lighting guides recommend placing the main light slightly to the side and above the face rather than relying entirely on overhead lighting.
How to Fix a Grainy Webcam
Before replacing your webcam, try these simple fixes.
1. Add Light in Front of Your Face
This should be your first step.
You don't necessarily need an expensive studio setup.
Try:
- Sitting facing a window during the day
- Moving a desk lamp in front of you
- Using a monitor light
- Adding a small LED light
- Using a webcam with a built-in light
The goal isn't simply to make your entire room brighter.
You want to give the camera more useful light on your face.
2. Move Your Light Closer
A light source doesn't have to be extremely powerful if it's positioned effectively.
Try moving your light closer to your face and slightly above eye level.
If the light is too harsh, move it farther away or reduce its brightness.
A good setup should illuminate your face without making your forehead or cheeks look overly bright.
3. Avoid a Bright Window Behind You
If possible, turn your desk around so the window is in front of you.
If you can't change your desk position, consider adding a front-facing light to balance the brightness difference.
This simple change can sometimes make a bigger difference than changing your webcam resolution.
4. Clean Your Webcam Lens
Not every blurry or low-quality webcam image is caused by low light.
A fingerprint, dust, or smudge on the lens can reduce contrast and make your video look soft.
Before changing camera settings, gently clean the lens with a suitable microfiber cloth.
It's a small step, but it's free.
5. Check Your Camera Settings
If your webcam software gives you manual controls, check settings such as:
- Exposure
- Brightness
- White balance
- Gain
- Focus
- Resolution
- Frame rate
However, don't assume that increasing brightness will solve everything.
Software can brighten a dark image, but it cannot create the same information that the sensor would capture with better lighting.
In low light, increasing gain can make both the useful image signal and unwanted noise more noticeable.
Does a Ring Light Help With a Grainy Webcam?
Yes, it can.
Looking for a Simpler Lighting Setup?
A webcam with built-in adjustable lighting can help you get more consistent video without adding a separate ring light to your desk.
A ring light or other front-facing light can provide more consistent illumination on your face, giving the webcam more light to work with.
This is especially useful if you frequently:
- Work at night
- Join video meetings in a dark room
- Stream from a bedroom or home office
- Record YouTube videos
- Teach online
- Create content after sunset
The important thing is not simply having a bright light.
Control matters too.
A useful webcam light should ideally let you adjust its brightness and, depending on your environment, its color temperature.
That makes it easier to adapt your lighting for different rooms and times of day.
Built-In Webcam Light vs. Separate Light
If you use a separate ring light, you can get excellent results. But there is one obvious downside:
It adds another piece of equipment to your desk.
You may need:
- Another USB cable
- Another power connection
- More desk space
- Another stand
- Another device to adjust
For a permanent streaming setup, this may not be a problem.
But for a home office, laptop setup, student desk, or small workspace, simplicity can be valuable.
That's where a webcam with a built-in light can make sense.
Instead of setting up a webcam and light separately, the camera and front-facing light are integrated into one device.
What Should You Look for in a Webcam for Low-Light Rooms?
If you regularly use your webcam at night, don't focus on resolution alone.
A good low-light webcam setup should also consider:
1. A Useful Light Source
A built-in fill light can help illuminate your face when room lighting isn't ideal.
2. Adjustable Brightness
Different rooms require different amounts of light. Adjustable brightness gives you more control.
3. Multiple Color Temperatures
The color of your room lighting can change throughout the day.
Having different light temperatures can make it easier to create a more natural-looking image.
4. Good Autofocus
Lighting isn't the only factor affecting perceived image quality.
If your webcam constantly struggles to focus, your video can still look soft even when the room is bright.
5. A Capable Image Sensor
Better lighting helps any webcam, but the camera still needs a capable sensor and lens to capture detail.
6. Appropriate Resolution and Frame Rate
Higher resolution isn't automatically better in every situation.
For example, 4K can provide more detail when supported by your software and computer, while 1080p at 60fps can be useful when smoother motion is more important.
A Webcam Designed for Both Light and Detail
If you want to simplify your setup, the Angetube 866Max combines a webcam and adjustable fill light in one device.
Angetube 866Max 4K Webcam with Light
The 866Max features 4K video at 30fps and 1080p at 60fps, along with a built-in adjustable ring fill light. The light provides three color temperatures and adjustable brightness, allowing you to adapt the lighting to different environments.
It also includes TOF autofocus, which is designed to keep your subject in focus without requiring you to constantly adjust the camera manually.
This combination can be particularly useful if your workspace changes throughout the day.
For example:
Daytime → use natural window light with a lower fill-light setting.
Evening → increase the built-in light to brighten your face.
Late-night calls → use the adjustable light to compensate for a darker room.
Instead of adding a separate ring light to your desk, you can adjust the lighting directly around the webcam.
Explore the Angetube 866Max
4K @ 30fps • 1080p @ 60fps • Built-In Adjustable Ring Light • 3 Color Temperatures • TOF Autofocus
[Check 866Max Price & Details →]
Does a Better Webcam Fix Low-Light Video?
Not by itself.
This is an important point.
A more capable webcam can help, but lighting still matters.
Think of it this way:
Camera + Light + Environment = Image Quality
Even a high-resolution webcam can struggle when there is very little light.
On the other hand, adding appropriate front-facing light can allow a webcam to capture a cleaner and more detailed image.
Recent webcam guidance continues to emphasize this relationship: low light can increase visible noise, while improving the light reaching the subject gives the camera more usable information to capture.
So before spending hundreds of dollars on a new camera, try improving the light first.
Quick Checklist: Fix Your Grainy Webcam Tonight
If your webcam looks terrible after sunset, try this checklist:
☐ Put a light in front of you
☐ Avoid having a bright window behind you
☐ Move the light closer
☐ Reduce harsh overhead lighting
☐ Clean your webcam lens
☐ Check exposure and gain settings
☐ Make sure you're using the resolution you expect
☐ Add a webcam light if your room is consistently dark
☐ Consider a webcam with adjustable built-in lighting
You may be surprised by how much difference a small lighting adjustment can make.
Final Thoughts
A grainy webcam at night doesn't necessarily mean you need a new webcam.
In many cases, the underlying problem is simply insufficient light.
Start with the basics: put light in front of your face, avoid strong backlighting, clean your lens, and check your camera settings.
If you regularly work, stream, teach, or attend video calls in low-light environments, a webcam with a built-in adjustable light can make your setup simpler and more consistent.
The Angetube 866Max combines 4K video, 1080p at 60fps, TOF autofocus, and an adjustable three-color-temperature ring fill light in one webcam, giving you more control over both your image and your lighting without requiring a separate ring light.
Better webcam video doesn't always start with a better camera. Sometimes, it starts with better light.

