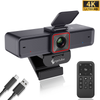

 967Ultra
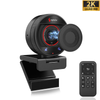
 Angetube 913Ai
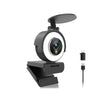
 Angetube 866MAX
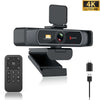
 Angetube 914Max
 PTZ 4K 871Ai
 Angetube @30fps 863Plus
 Angetube @60FPS 873Ai
 Angetube 967Pro
 Angetube 967
 Angetube 862Pro
 Angetube 680C
 Angetube 920
 Angetube 963
 Angetube 962
 Angetube 925c
 862Pro
 863PLUS
 913AI
913AI

Angetube cameras are popular for excellent customer support and high quality images.
However, sometimes users may experience problems with the camera not working properly. This article explores common problems that can cause an Angetube camera to stop working and provides solutions to ensure that the camera returns to normal operation.
Common Issues.
Camera Not Recognized: Sometimes, after connecting the Angetube camera, your computer may fail to recognize the device. This can happen for various This can happen for various reasons.
Solution.
-
Firstly, ensure that you have correctly connected the camera to your computer's USB port. If the problem persists, try the following steps.
-
Disconnect and reconnect the camera
-
Check if the USB port is functioning correctly
Windows computer not detecting the camera device problem:
If the camera device is not detected by Windows system, or the name of the camera device in Device Manager does not match the camera, please try the following actions:Method
- 1.Remove the webcam > Reconnect the computer, the webcam device is recognized correctly or restart the computer;
-
Method 2. If your computer has installed other camera devices, according to method 1 is still not resolved, please follow the steps below: Windows XP SP2 and Windows 7 / 8 / 10 systems: right mouse button click on the "My Computer" icon > "Manage " > "Device Manager" > "Sound, Video, and Game Controllers", "Image Devices" (or "Camera"), and "Video Camera". Camera") and "Sound Input/Output" options uninstall "USB Live camera" and "USB Live camera audio ".
-
Remove USB camera > Reconnect the USB camera to the computer, the computer reloads the USB camera and installs the driver automatically, and "USB Live Camera" reappears in the device manager to initiate a video call.
Mac computer does not detect the camera problem:
In rare cases, Mac OS10.6 or above does not detect USB Live Camera or the name of the detected camera is not consistent with the camera, please restart the computer or re-plug the camera, or replace another USB port. If the camera is still not detected, it may be because the MAC system does not automatically load the driver for USB Live Camera, please follow the steps below to reset PRAM:
-
① Turn off the computer;
-
② Find the following keys on the keyboard: Command, Option, P and R. You will need to press these keys at the same time in step 4;
-
③Start the computer;
-
④ Press and hold the key combination Command-Option-P-R at the same time before the gray screen is displayed;
-
⑤ Press and hold the above keys until the computer restarts and you will hear the startup sound again;
Black or Blurred Image: The video image of the Angetube camera is black or blurred, which can be caused by different reasons:
-
Due to the small privacy switch on some webcams, before starting a video conference, check that the switch on the privacy cover has not been turned on.
-
Check if there are fingerprints on the camera lens (this will directly cause the image to be blurred)
-
Check to block other apps from using your camera. ,Zoom, Meet, Skype, Teams, FaceTime, Photobooth - There are so many different apps with video conferencing capabilities that we often have to use more than one at a time to meet the needs of different people in our lives. Switching between platforms is usually fine, but if you forget to close one platform, you may not be able to continue using another.
Angetube Software-Related Problems:
Angetube cameras usually come with their own video software, but you may encounter software-related problems. Here are some common problems and solutions:
-
How to Download:
To download the software, visit this link: https://angetube.com/pages/download-angetube-software
-
How to get an activation code:
If you are using the software for the first time, you will need an activation code. Obtaining an activation code is very simple. Simply send the machine code shown in the software to support@angetube.com and our support team will send you the activation code as soon as possible.
-
How to change the resolution:
Open the software.
Click the "+" icon in the bottom right corner of the page.
Select "USB Live Camera" as the video device name.
After adding the video device, click the third "Settings" icon at the bottom right corner.
Under "Resolution/FPS Type" select "Custom".
You can now select various resolutions on the next line.
-
What features does the software offer:
Angetube video software offers a variety of features including exposure control, auto focus, zoom, saturation adjustment, horizontal flip, vertical flip, photo capture, video recording and more. Click on the third page "Camera Properties" at the bottom right corner of the software and at the bottom of the page you can see the buttons for each icon.
Contact Support:
If you encounter an issue that cannot be resolved, you can always contact the Angetube (support@angetube.com) support team for further help and support. They will be happy to provide you with a solution.
Conclusion:
The Angetube camera is a high-quality product. By following the solutions above, you can resolve most common issues and ensure your camera is back in working order to continue delivering excellent video and audio quality.


