
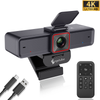
 967Ultra
 Angetube 913
 Angetube 866MAX
 Angetube 914pro
 PTZ 4K 871Ai
 Angetube 863plus
 Angetube @60FPS 873Ai
 Angetube 967Pro
 Angetube 967
 Angetube 862pro
 Angetube 628
 Angetube 920
 Angetube 963
 Angetube 962
 Angetube 827
How to Set Up a Webcam on OBS Studio: The Complete Guide for Better Streaming
Nov 02, 2026

Want to create professional-looking live streams, gaming videos, or online content? Your webcam is only part of the equation. With the right OBS Studio settings, you can get clearer images, smoother video, and a more polished streaming experience.
A better webcam setup starts here.
OBS Studio gives creators the flexibility to customize their video sources, adjust resolution and frame rates, add overlays, and build professional streaming scenes. Whether you're a beginner or an experienced content creator, knowing how to configure your webcam properly can make a real difference.
In this guide, we'll show you how to set up a webcam on OBS Studio, optimize your camera settings, troubleshoot common problems, and choose the right webcam for your streaming needs.
Before You Start: Build Your Streaming Setup
Before opening OBS Studio, make sure your equipment is ready.
| Equipment | What You Need |
|---|---|
| Webcam | A USB webcam supporting your preferred resolution |
| Computer | A compatible Windows or macOS computer |
| USB Connection | A suitable USB port and reliable cable |
| Software | The latest version of OBS Studio |
| Lighting | A soft light source for a clearer image |
| Microphone | Optional, for more advanced audio recording |
Getting started with OBS Studio?
Download it directly from the official website:
01 — Connect Your Webcam to OBS Studio
The first step is getting your webcam recognized by OBS.
<em>It only takes a few clicks to add a camera source.</em>
Step 1. Connect Your Webcam
Connect your webcam to your computer using its USB cable.
For high-resolution webcams, use a compatible USB 3.0 port whenever possible. A direct connection to your computer is generally preferable to an unpowered USB hub.
Wait for your operating system to recognize the camera.
Step 2. Open OBS Studio
Launch OBS Studio and select the scene where you want your webcam to appear.
If you're new to OBS, the Auto-Configuration Wizard can help you establish an initial setup.
Step 3. Add a Video Capture Device
In the Sources panel:
-
Click the + icon.
-
Select Video Capture Device.
-
Choose Create New.
-
Give your webcam source a name, such as "Main Webcam."
-
Click OK.
-
Select your webcam from the Device dropdown menu.
Your camera feed should now appear in the OBS preview window.
A small but useful tip: If you're creating a gaming stream, place your webcam in a corner of the screen so viewers can see both your gameplay and your reactions.
[IMAGE PLACEHOLDER — OBS Studio Video Capture Device settings screenshot]
Suggested image ALT: How to add a webcam to OBS Studio using Video Capture Device

02 — Choose the Right Webcam Resolution and Frame Rate
This is where your video quality starts to take shape.
Resolution determines how much detail your camera captures, while frame rate determines how smoothly movement appears.
Which Settings Should You Choose?
<em>Different content requires different camera settings.</em>
| Resolution | Frame Rate | Recommended Use |
|---|---|---|
| 1080p | 30fps | Video calls and everyday streaming |
| 1080p | 60fps | Gaming and fast-moving content |
| 4K | 30fps | High-detail recording and professional content |
1080p or 4K: What's Better for Streaming?
1080p is a practical choice for everyday live streaming. It offers a good balance between image quality and system performance.
4K provides more image detail. It can be useful when recording professional content, creating detailed product demonstrations, or cropping and reframing footage.
However, a 4K webcam does not automatically mean your final live stream will be broadcast in 4K. Your OBS output settings, computer hardware, encoder, internet connection, and streaming platform all matter.
How to Change Webcam Resolution in OBS
-
Find your webcam under Sources.
-
Right-click the source and select Properties.
-
Locate Resolution/FPS Type.
-
Choose Custom if you want to manually configure the camera.
-
Select a supported resolution and frame rate.
[IMAGE PLACEHOLDER — OBS webcam resolution and FPS settings]
Suggested image ALT: OBS Studio webcam resolution and FPS settings for 4K and 1080p streaming
03 — Optimize OBS Video Settings for a Clearer Stream
Your webcam settings and OBS output settings work together, but they control different things.
Go to Settings → Video in OBS Studio.
You'll find two important options.
Base (Canvas) Resolution
This controls the size of your OBS workspace.
For a standard Full HD streaming layout, 1920 × 1080 is a common choice.
Output (Scaled) Resolution
This determines the resolution of your final stream or recording.
For example, you can capture video from a 4K webcam while streaming at 1920 × 1080.
This gives you more flexibility when cropping, resizing, and positioning your webcam feed.
What About FPS?
For most creators:
-
30 FPS: A good starting point for presentations, talking-head videos, and standard streaming.
-
60 FPS: Better suited to gaming and scenes with frequent movement.
Choose settings that your computer can handle consistently. A stable stream is usually better than a higher resolution that causes dropped frames.
[IMAGE PLACEHOLDER — OBS Studio Video settings showing Base Canvas and Output resolution]

04 — Make Your Webcam Look More Professional
Even an excellent webcam can produce disappointing results if the lighting, framing, and camera settings aren't right.
Here are five adjustments worth making.
Lighting: The Secret Behind Better Webcam Quality
<em>Good lighting can make a bigger difference than you might expect.</em>
Position a soft light source in front of you, slightly above eye level.
Avoid sitting directly in front of a bright window. Strong backlighting can make your face appear too dark.
A ring light or softbox can help create a more balanced image.
Exposure and White Balance
Exposure controls how bright your image appears.
White balance helps keep colors looking natural.
If your webcam image looks too yellow, blue, dark, or washed out, these settings are worth checking. Available controls vary by webcam and compatible camera software.
Autofocus: Keep Your Subject Sharp
Autofocus is especially useful when you're moving around, demonstrating products, or switching between different positions.
For a stationary talking-head setup, you may prefer a consistent focus position. For dynamic content, responsive autofocus can help keep your subject clear.
Camera Position: Get the Right Angle
Place your webcam close to eye level.
Keep enough distance between yourself and the camera to create a natural-looking frame. Avoid placing the camera too close to your face unless you're intentionally creating a close-up shot.
Zoom: Frame Your Shot Carefully
Digital zoom can help adjust the composition without physically moving the camera.
However, excessive digital zoom may reduce perceived image detail. Start with a wider frame and adjust gradually.
05 — Meet the Angetube 913Max: A 4K Webcam for Content Creators

More detail. More control. A better streaming setup.
When you're building a streaming setup, choosing the right webcam is just as important as configuring your software.
The Angetube 913Max 4K Webcam is designed for creators who want detailed video, responsive autofocus, and flexible framing options.
Whether you're recording videos, hosting live streams, presenting products, or joining online meetings, its combination of imaging and control features offers more flexibility for everyday content creation.
A Large 1/1.5-Inch Sony Sensor
At the heart of the 913Max is a 1/1.5-inch Sony CMOS sensor.
A larger image sensor can help capture more light and detail, making it a valuable feature for indoor recording and changing lighting conditions.
4K at 30fps or 1080p at 60fps
<IMAGE PLACEHOLDER — 913Max showing 4K image quality or resolution comparison>
Choose the video mode that fits your content:
4K at 30fps
Ideal for detailed video recording, presentations, and content where image clarity is a priority.
1080p at 60fps
A great option for gaming streams and scenes where smooth motion matters.
The 913Max gives you flexibility to select the capture mode that suits your workflow.
PDAF Autofocus for Responsive Focusing
The 913Max features Phase Detection Autofocus (PDAF), helping keep your subject in focus.
This is particularly useful for product demonstrations, live shopping, and creators who move naturally while recording.
5X Digital Zoom and Touch Controls
Fine-tune your framing with 5X digital zoom and convenient touch controls for brightness and zoom.
These features make it easier to adjust your image without constantly repositioning your webcam.
USB 3.0 Connectivity and Built-In Dual Microphones
With a USB 3.0 interface supporting 5Gbps, the 913Max is designed for high-bandwidth video connectivity.
It also includes dual built-in microphones for convenient audio pickup.
For creators who want more advanced audio control, an external microphone can be added as a separate audio source in OBS.
Ready to upgrade your streaming setup?
Discover how the Angetube 913Max can complement your OBS workflow.
Explore the Angetube 913Max 4K Webcam →

06 — Common OBS Webcam Problems and How to Fix Them
Even after configuring everything correctly, you may occasionally run into problems.
Here are some quick solutions.
Webcam Not Showing Up in OBS?
Try the following:
-
Check the USB connection.
-
Try another USB port.
-
Close other applications that may be using the webcam.
-
Reopen OBS and check the Device dropdown.
-
Confirm that your operating system recognizes the camera.
Black Screen in OBS?
A black screen may indicate that OBS cannot access the camera or that the selected capture settings are unsupported.
Open the webcam properties, confirm the correct device, and try switching Resolution/FPS Type to Device Default.
Webcam Video Is Lagging or Freezing?
High CPU usage, limited USB bandwidth, or demanding video settings can cause unstable video.
Try lowering the webcam resolution or frame rate temporarily. Close unnecessary applications and connect the webcam directly to your computer.
Why Is My 4K Webcam Only Showing 1080p?
Check that:
-
Your webcam supports 4K at the selected frame rate.
-
You're using a compatible USB 3.0 connection.
-
The correct camera device is selected.
-
Another application isn't controlling the camera.
-
OBS has been restarted after changing the connection.
Available resolution options can vary depending on your camera, operating system, USB connection, and video format.
07 — Frequently Asked Questions
Q1. How do I add a webcam to OBS Studio?
Go to Sources, click the + icon, select Video Capture Device, and choose your webcam from the Device dropdown menu.
Q2. What is the best webcam resolution for OBS?
1080p is a practical starting point for most streams. A compatible 4K webcam is a good option when you need more image detail.
Q3. Can I use a 4K webcam with OBS Studio?
Yes. OBS supports compatible 4K webcams through its Video Capture Device source. Select a supported 4K resolution and frame rate in the camera properties.
Q4. Is 30fps or 60fps better for streaming?
30fps works well for presentations and standard video content. 60fps is generally better for gaming and fast-moving scenes.
Q5. Can I use the Angetube 913Max with OBS?
The Angetube 913Max is designed for use with compatible video applications. Connect it through USB, add it as a Video Capture Device, and select a supported resolution and frame rate.
Q6. Do I need an external microphone for OBS?
No. You can use your webcam's built-in microphone or select another audio input device. An external microphone is optional but can provide more control over your audio.
Final Thoughts: Build a Better Webcam Streaming Setup
A professional-looking stream isn't just about having an expensive camera. It's about combining the right webcam, lighting, camera settings, and streaming software.
With OBS Studio, you can customize your video sources, optimize your resolution and frame rate, and create a streaming setup that fits your content.
And if you're looking for a webcam with more flexibility, the Angetube 913Max brings together a large Sony sensor, 4K capture, 1080p at 60fps, PDAF autofocus, and 5X digital zoom.
Create with confidence. Stream with clarity. Make every frame count.

