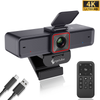

 967Ultra
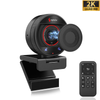
 Angetube 913
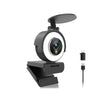
 Angetube 866MAX
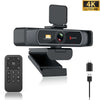
 Angetube 914pro
 PTZ 4K 871Ai
 Angetube 863plus
 Angetube @60FPS 873Ai
 Angetube 967Pro
 Angetube 967
 Angetube 862pro
 Angetube 628
 Angetube 920
 Angetube 963
 Angetube 962
 Angetube 827
 862Pro
 863PLUS
 913AI
913AI

Dive into the Enigmatic Realm of Webcam Portals: An Odyssey into Crafting Your Digital Window to the World
Venturing into the labyrinthine world of the internet can sometimes feel like piloting a ship through a stormy sea. Amidst this vast expanse, one beacon that beckons many is the allure of creating their own live webcam website. But how? Ah, let us embark on this journey, delving deep into the unknown!
-
Ephemeral Beginnings: Before all else, ponder upon the purpose of your site. Is it an artistic expression, a glimpse into your daily life, or perhaps an educational portal? The spirit of your site will shape its very essence.
-
Tools & Whistles: Grasp the plethora of technological tools that whisper their names in the corridors of cyberspace. From sleek software to ravishing recording devices, your choices here will paint the canvas of your viewer's experience.
-
The Safety Dance: Traversing the digital realm is not without its dragons. Secure your portal. Encrypted channels, sturdy firewalls, and vigilant monitoring are the shields and swords you'll need in your arsenal.
-
An Audience Awaits: Like the sirens' call, you must lure your audience into your digital embrace. SEO spells, tantalizing thumbnails, and engaging ephemera are your tools of enchantment.
-
Monetize, but with Majesty: Coins will clink in your coffers if you approach monetization with both grace and gusto. Subscription models? Tip jars? Decide, but always ensure the value shines through.
-
Feedback's Fickle Finger: The whispers of your audience, both sweet and sour, are like the wind guiding your sails. Listen, adapt, and evolve.
-
The Odyssey Continues: Remember, the realm of webcam portals is ever-shifting, like sand dunes under a desert moon. Stay curious, stay hungry, and most importantly, stay enchanted.
Breathe deep, intrepid explorer of the digital age. Your journey into the world of live webcam websites, unpredictable and filled with twists, awaits. Ready your vessel and set sail!
Step 1
Embarking on the journey of creating a website necessitates a reliable web hosting provider. Here's how to approach this pivotal choice:
- Assess the Options: The digital landscape is teeming with numerous web hosting providers, each with its unique price points and features.
- Unlimited Space & Traffic: For live webcasts, hosts offering unlimited web hosting plans can be particularly beneficial, ensuring your website can handle a surge in traffic and store substantial amounts of data.
- Additional Features: Some hosts go above and beyond by offering tools for website construction and dedicated technical support. Such features can drastically simplify the site-building process.
- Domain Name Selection: As you register, you'll be prompted to choose a domain name. Should your desired name be unavailable, many hosting services will suggest alternative names that resonate closely with your original choice.
Choosing a web hosting service is like selecting a foundation for your digital house. Thus, invest time and thought to ensure it stands strong and serves you well.
Step 2
Diving into the website creation phase, you're presented with two primary avenues:
-
Utilizing Host Tools: Most hosting providers equip you with intuitive tools and platforms for website creation. These usually feature drag-and-drop interfaces, customizable templates, and plugins that make building a website relatively straightforward, even for beginners. Leveraging these tools can be cost-effective and time-saving. Plus, they're designed to integrate seamlessly with the hosting environment.
-
Engaging a Professional Designer: If you're aiming for a more unique, complex, or branded design, hiring a professional web designer is the way to go. A designer can craft a website tailored to your vision and ensure it's optimized for user experience and performance. While this route may be pricier, the expertise and customization offered often justify the investment. A well-designed site can enhance user retention, improve SEO rankings, and give your platform a polished, professional appearance.
The choice hinges on your goals, budget, and how hands-on you wish to be in the process. Whether you opt for DIY with hosting tools or invest in professional expertise, ensure your website aligns with your brand and meets your audience's needs.
Step 3
To enable a live webcast on your website, you need a robust media program equipped with a live encoder. This tool transforms your video and audio feed into a digital format suitable for streaming over the internet. Here's how to get started:
-
Choosing the Right Encoder: While Adobe Flash Player was a popular choice in the past, its support has ended, and it's no longer considered secure or the industry standard. Instead, look for modern encoding solutions known for reliability and versatility. Some reputable alternatives include:
- OBS Studio: A free, open-source software that's compatible with various operating systems. It offers a wide array of customization options and supports multiple streaming platforms.
- Wirecast: A professional live streaming production tool that provides advanced features such as chroma key, integrated video chat, and more.
- vMix: A comprehensive live production software that comes with a suite of features, including graphics, overlays, and instant replays.
- Installation and Setup: Once you've chosen an encoder, download and install the software. Familiarize yourself with its interface and settings, ensuring the output settings match the requirements of your hosting platform or Content Delivery Network (CDN).
- Integration with Website: After setting up the encoder, you'll need to integrate it with your website. This often involves copying a unique streaming key or URL from your hosting platform and pasting it into the encoder's settings.
- Test Before Going Live: It's crucial to conduct test streams to ascertain video quality, audio clarity, and ensure there are no lags or interruptions. This ensures your viewers enjoy a seamless webcast experience.
Remember, while the technicalities are essential, content is equally vital. Ensure your webcast offers value, be it in the form of entertainment, education, or engagement.
Step 4
Embedding a live encoder into your website enables your audience to view the webcast directly from your platform. It's a straightforward process but requires attention to detail. Here's a step-by-step guide to doing this:
-
Obtain the Embed Code: Once you've set up and configured your encoder program, it will typically provide you with an embed code. This code is usually in HTML format and acts as the bridge between your encoder and website, enabling the live stream to be displayed on your site.
-
Access Your Website Editor: Log in to your web hosting account or website management platform. Navigate to your site's backend or dashboard, where you can edit your website's content. This area is often labeled as 'Page Editor,' 'Site Builder,' or something similar depending on the platform you're using.
-
Locate the Desired Embed Spot: Decide where you want the live stream to appear on your website. This could be a dedicated 'Live Stream' page, on the homepage, or any other appropriate spot. Navigate to that particular page within the editor.
-
Embed the Code: In the editing mode, find an option to add or edit 'HTML' or 'Code'. Click on it, and a box will appear where you can paste in code. Copy the embed code from your encoder and paste it into this box.
-
Save & Preview: After pasting the code, save your changes. It's a good practice to preview the page to ensure the live stream embed appears as expected and functions correctly.
-
Go Live: Once everything looks and works fine, and you're ready to broadcast, initiate the live stream from your encoder software. Your audience should now be able to view the live webcast directly from your website.
Step 5
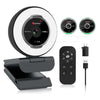
Setting up your webcam and microphone is essential for a quality webcast. Whether you opt for internal or external devices, the setup process is generally straightforward. Here's how to go about it:
-
Using Internal Webcam & Microphone:
- Most modern laptops and some desktop monitors come with built-in webcams and microphones.
- Ensure your software or web platform has permission to access these devices. On many operating systems, you can grant permissions via 'Settings' or 'System Preferences'.
- Test them in your streaming or video conferencing software to verify they're working correctly.
-
Setting Up External Webcam & Microphone:
- Connection: Connect your external webcam and microphone to the computer, typically using a USB port. Some high-end devices might use HDMI or other connectors.
- Install Drivers: While many devices are plug-and-play, some might require you to install specific drivers. These drivers usually come with the device or can be downloaded from the manufacturer's website.
- Configure in Software: Open your broadcasting or video software. Go to the settings or preferences section, and under video and audio options, select your external webcam and microphone as the primary devices.
- Adjust Positioning: Place the webcam at a suitable angle, usually eye level, to ensure a flattering and clear view. Position the microphone close enough to capture sound clearly but not so close that it picks up unnecessary noise or causes distortion.
-
Test & Tweak:
- Conduct a test recording or a private live stream. This allows you to verify the quality of the video and audio.
- Adjust settings such as resolution, frame rate, or audio gain if required. Most streaming software will allow you to make these adjustments.
- Ensure your background is tidy and free from distractions. Also, consider the lighting to ensure you're visible and the video quality is optimal.
-
Troubleshooting: If you face any issues, ensure:
- All connections are secure.
- Drivers are updated.
- The selected devices in the software settings match your external devices.
Setting up your devices correctly is crucial for delivering a professional and engaging webcast. It's worth the time to test and tweak settings for the best results.
Step 6
Initiating a live broadcast using a media program with a live encoder can be a straightforward process, though the exact steps may vary depending on the software you're using. Generally, here's a basic guideline to start your broadcast:
-
Launch the Media Program: Open your chosen media software that has a live encoder feature. Examples include OBS Studio, Wirecast, vMix, among others.
-
Configure Your Sources: Before broadcasting, ensure that your webcam and microphone sources are correctly set up and visible in the software. You should see a preview of your video feed and hear audio if everything is correctly configured.
-
Verify Streaming Settings:
- Navigate to the software's settings or preferences.
- Ensure the streaming settings (e.g., bitrate, resolution) are optimized for your internet connection and desired quality.
- Confirm that the stream key or URL from your hosting platform or website is correctly inputted. This ensures that your broadcast gets sent to the right location.
-
Initiate the Broadcast:
- Look for a button or option typically labeled "Start Streaming," "Go Live," or simply "Broadcast."
- Click on this button.
-
Monitor the Stream: Once live, keep an eye on your software's dashboard. It should provide real-time feedback regarding stream health, viewer count, and potential issues.
-
Engage with Your Audience: If your platform supports live chat or comments, interact with your viewers. It can enhance viewer engagement and create a more interactive experience.
-
Ending the Stream: Once you're done with your broadcast, click the button or option typically labeled "Stop Streaming" or "End Broadcast."
-
Post-Broadcast: Review any recordings or analytics provided by your software or hosting platform. This data can offer insights for improving future broadcasts.
Remember, while the above steps provide a general guideline, always refer to the documentation or user guide specific to your chosen software for detailed instructions.


