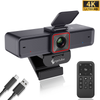

 967Ultra
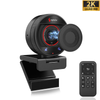
 Angetube 913
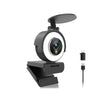
 Angetube 866MAX
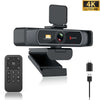
 Angetube 914pro
 PTZ 4K 871Ai
 Angetube 863plus
 Angetube @60FPS 873Ai
 Angetube 967Pro
 Angetube 967
 Angetube 862pro
 Angetube 628
 Angetube 920
 Angetube 963
 Angetube 962
 Angetube 827
 862Pro
 863PLUS
 913AI
913AI
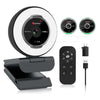
How To Maximizing Your Webcam’s Reach for Video Calls
von {{ author }} Angetube an Oct 23, 2023

Ever felt shackled by the confining length of your webcam's USB cable? Particularly when you're aiming for that perfect angle in a spacious conference hall, a spruced-up home workspace, or a quirky corner with that oh-so-distant power socket? Enter the powered extension cable—a handy ally in amplifying your webcam's reach. And while USB hubs might seem tempting, tread cautiously. They've been known to bring along unwanted guests like latency and power hitches.
USB Hubs Versus Powered Extension Cables: What's the Score?
USB hubs, with their allure of multi-device connectivity, might seem like a natural choice for webcam extensions. Yet, they often fall short when compared to powered extension cables. Known culprits for introducing latency—think video lags, unexpected freezes, and delays—USB hubs aren't always the hero they appear to be.
Furthermore, these hubs can quickly become hot under the collar, potentially affecting performance. And here's another kicker: when you use a hub, it divides the power of your computer's port, essentially diluting it across multiple outputs. Each outlet then only manages to sip a fraction of the power, potentially hindering device performance.
The Superiority of Powered Extension Cables
With powered extension cables, you're in for a smoother connection experience, largely free from pesky interferences—something hubs can't always guarantee. If you're working with a spacious setting and require that extra length for your webcam, look no further. An active extension cable is your top-tier choice.
The Gold Standard for Extending Your Webcam Cable
Kick things off by securing an active extension cable tailored for your webcam. Unspool the extension cable, guiding it to your chosen spot for the webcam. Then, connect your webcam’s USB cable to the extension. Next, insert the extension cable into your computer's USB slot. In a flash, your computer should acknowledge the presence of the webcam. If, for some reason, it plays coy and doesn't recognize it, fret not! Simply plug in the included AC adapter to the extension cable. This extra power boost is often the nudge your system needs to recognize your trusty webcam.
Troubleshooting Tips for Webcam Woes
1. Computer Doesn't Recognize the Webcam:
If, after hooking up with a powered extension cable, your computer gives the cold shoulder to your webcam, here's a potential remedy: Connect your webcam straight to your computer using its designated USB cable. At times, your system might need to fetch or refresh the necessary drivers, and the extension could be an obstruction in that process.
It's not uncommon for webcams to demand a maiden direct connection to set their bearings right. If this has you scratching your head, our support page offers a step-by-step troubleshooting guide. Ensure your webcam is in shipshape first, then venture again with the extension cable.
2. Zoom Turns a Blind Eye to the Webcam:
Occasionally, some apps might grumble with powered extension cables while others cooperate seamlessly. A classic example is Zoom, which sometimes doesn't play ball with extended webcams. The good folks at Zoom have noted this in their guidance manuals. Their recommendation? Consider rolling back your computer's OS to put things right.
Battling Webcam Lag Issues
Another hiccup you might encounter with extension cables is a discernible time gap between your camera capturing moments and the playback visual or audio on your computer. Suspect you're facing this? Here's a systematic way to diagnose and address it:
Diagnosing and Rectifying Webcam Delays:
-
Launch a Recording Tool: Open software like OBS. Windows users can turn to the built-in Camera application, while Mac aficionados can resort to PhotoBooth.
-
Set Up a Stopwatch: If your device doesn't boast a built-in stopwatch, there are a plethora of online options. For instance, you might try a dedicated stopwatch website.
-
Split and Position: Arrange your screen such that one half displays the stopwatch and the other showcases your chosen recording application.
-
Focus Your Webcam: Aim your webcam solely at the stopwatch on the screen, ensuring it doesn’t capture any portion of your recording application.
-
Roll the Cameras: Begin screen recording. If you're unfamiliar with this, PC Mag offers a stellar guide, catering to both Windows and Mac users.
-
Sync with the Stopwatch: Set the stopwatch in motion, allowing it to tick away for several seconds before concluding your recording. Play back your clip, scrutinizing the time alignment between your webcam's feed and the computer's output at varying intervals to pinpoint the playback delay.
To gauge the impact of the extension cord on this lag, a comparative test using the direct webcam USB against the active extension could be enlightening.
Revel in Extended Reach!
Armed with a powered extension cable, anticipate a dependable and seamless webcam experience, free from those irksome lags.
At Angetube, whether you're nestled at home or bustling in an office, we're committed to enhancing your tech experience. Dive into our diverse array of top-notch, wallet-friendly gadgets. Our specialty? Webcams. Dive deeper with us!


